

SMTP (simple mail transfer protocol) is an electronic standard for email transmission. When you receive an email in your inbox, most likely it is being sent from an SMTP server. Today we want to explore a few solutions and ways that you can use Google and or Gmail’s free SMTP server as a way to send emails in web applications, with custom domains, and your WordPress site.
The Lowdown on Google Free SMTP Server
For small businesses or companies with low email volume, Google’s free SMTP server can be a great solution and you can use Gmail in a sense to relay your email. They have a very large infrastructure and you can rely on their services to stay online. However, even though it is completely free, nothing is without its limits. According to Google’s documentation, you can send up to 100 emails every rolling 24-hour period when relaying through their SMTP servers. Or you could also look at it as 3,000 emails per month for free.
Depending on how many emails you send or how big your business is, this still might be more than enough. If you start getting into the 5,000+ emails per month, you are going to want to use a 3rd party transactional or premium email service. Below are a few good SMTP alternatives which you might want to look into.
- SendPulse (dedicated IP address and free up to 12,000 emails per month)
- Mailgun (free up to 10,000 emails per month)
- Mailjet (free up to 6,000 emails per month)
- SparkPost (free test account for 30 days)
- Amazon SES
- SendGrid
- SendWP ($9/month per site, very easy to setup)
But, Gmail’s free SMTP server still works great for a lot of people! Especially startups and developers that need something free and reliable when starting out.
Gmail Free SMTP Server Information
You can use Gmail’s SMTP server information in a number of different places. You can use this in your local email client like Microsoft Outlook or within your WordPress site with a plugin like Gmail SMTP or SendGrid. Check out our tutorial on how to send emails from within WordPress.
Outgoing Mail (SMTP) Server: smtp.gmail.com
Use Authentication: Yes
Use Secure Connection: Yes (this can be TLS or SSL depending on your mail client)
Username: GMail account (email@gmail.com)
Password: GMail password
Port: 465 or 587
Use Authentication: Yes
Use Secure Connection: Yes (this can be TLS or SSL depending on your mail client)
Username: GMail account (email@gmail.com)
Password: GMail password
Port: 465 or 587
Send and Receive Email in Gmail with Custom Domain
Did you know that you can also send and receive emails from custom domains within Gmail? Lots of people juggle multiple business and personal emails in today’s busy world, and consolidating them saves time from having to bounce around a lot. One easy way to do this is to simply use a G Suite email. However, these cost $5 per month but comes with a lot of extras. And if you are juggling multiple email addresses this can add up quite fast. We are going to show you a much cheaper solution that you might not have considered.
Let’s assume this is your case scenario and you have 4 emails you are trying to juggle:
- 1 personal Gmail account (yourname@gmail.com)
- 1 business email account for your WordPress business
- 2 business emails for other websites you run
A lot of times verification for things require that it come from a custom domain. Such as verifying LinkedIn company pages, Pinterest, etc. It also simply looks more professional when you are emailing people from a custom domain.
Step 1: Forward Email To Gmail
The first thing you need to do is forward the email from those 3 additional email accounts to your personal Gmail account (yourname@gmail.com). There are a couple ways you can do this. If you have access to your DNS records with your domain registrar, a lot of them now offer free email forwarding. NameCheap is an example of one that does. However, if you are using custom DNS records this option won’t be available. And this is where a 3rd party service like Pobox or MailGun comes into play.
Pobox allows you to forward up to 40 different addresses for $35 a year. If you were to purchase G Suite for 3 additional emails that would cost you $180 a year. Or you can use MailGun email routing rules which is completely free.
Step 2: Send Mail As (Google SMTP)
So now that you have all your email accounts forwarding mail to your personal Gmail account you need a way to send from those accounts.
Step 1
The very first thing you will need to do is ensure that you have 2-step verification enabled on your primary Gmail account. Important: If you don’t do this you will get an invalid password error further below when trying to authenticate your email address. So first go and enable 2-step verification.
Step 2
Next, you will need to generate an App password. You then use the app password in place of your personal Gmail password further below. This is the only way this process will work.
If you haven’t enabled 2-step verification you will get an error (see below) saying “The setting you are looking for is not available for your account.”
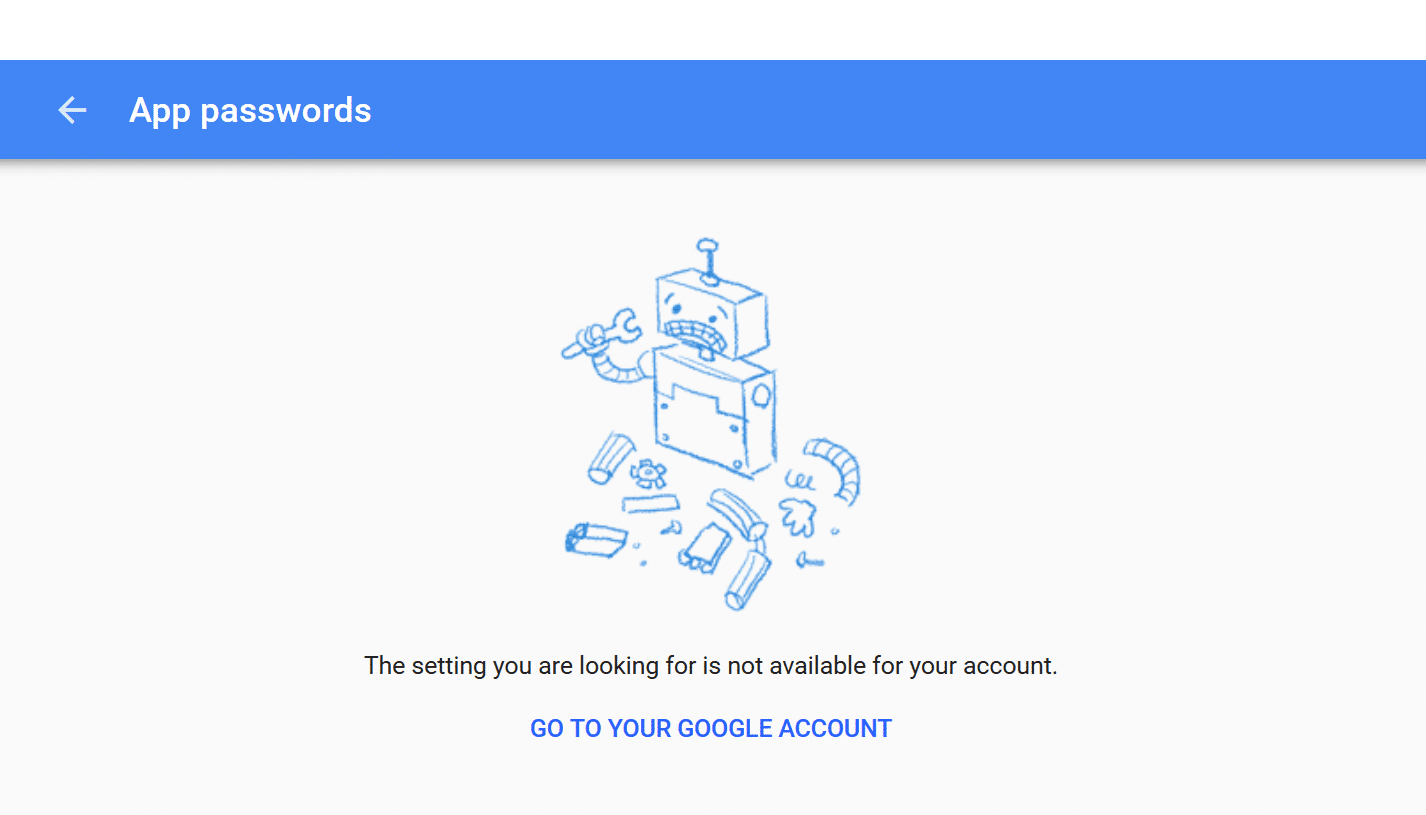
Google App password not available
When creating the app password simply choose “Other” and give it a name (example: my 2nd business email).
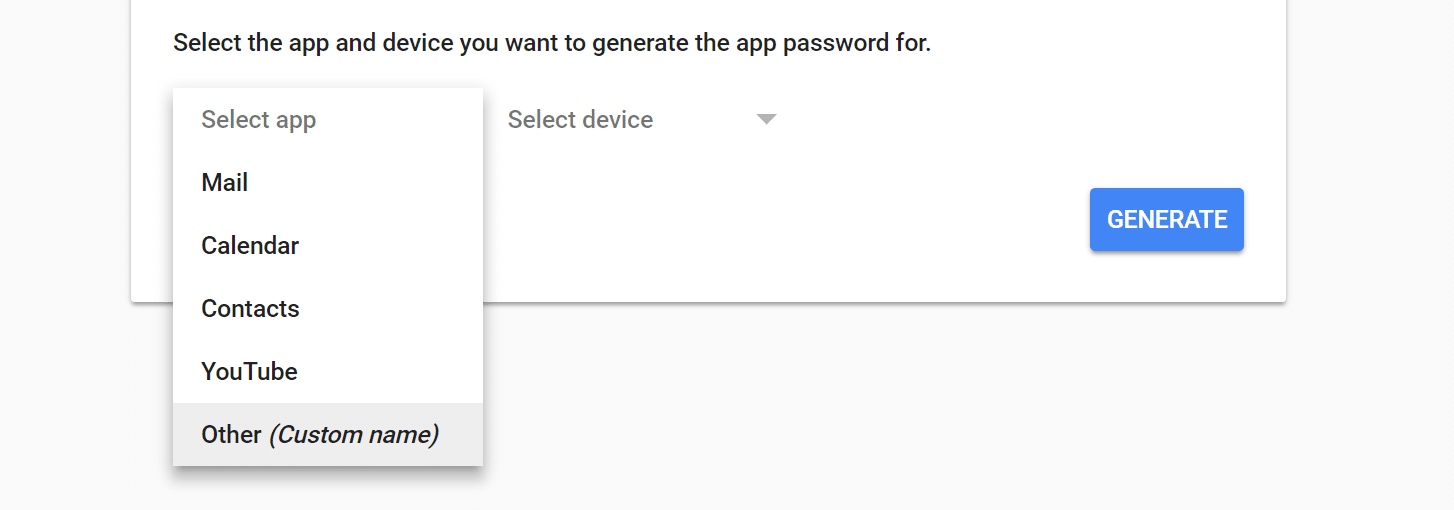
Generate app password
This will generate a password you will need to save for later.
Step 3
Now back in Gmail, go to settings, and can click on “Accounts and Import.” Then click on “Add another email address you own.”
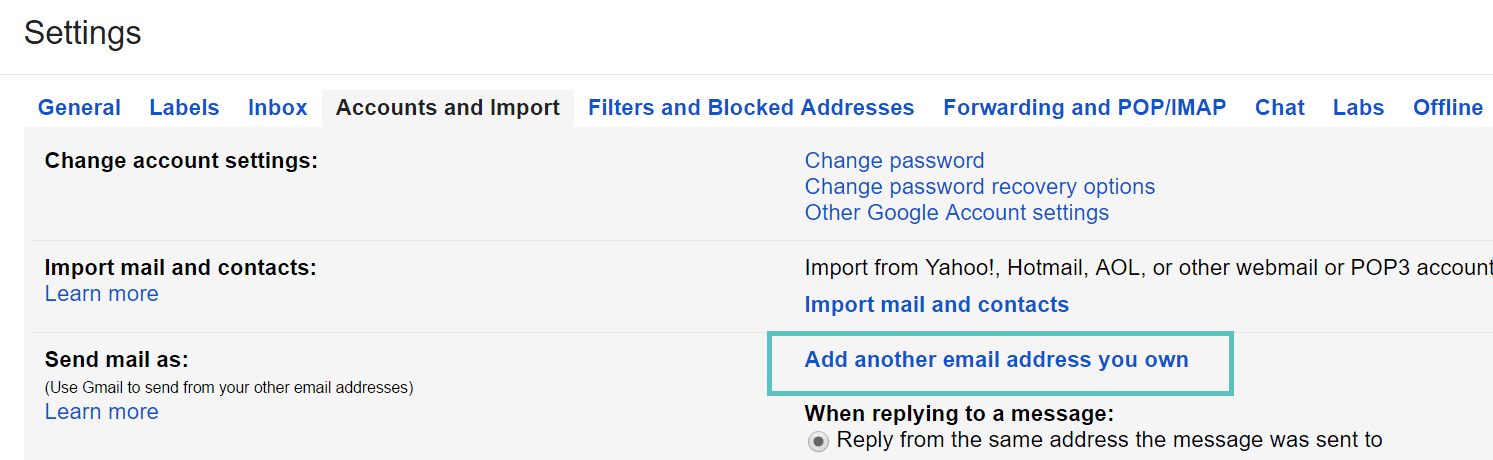
Gmail send mail as feature
Step 4
Enter your additional business name and business email that is on the custom domain.
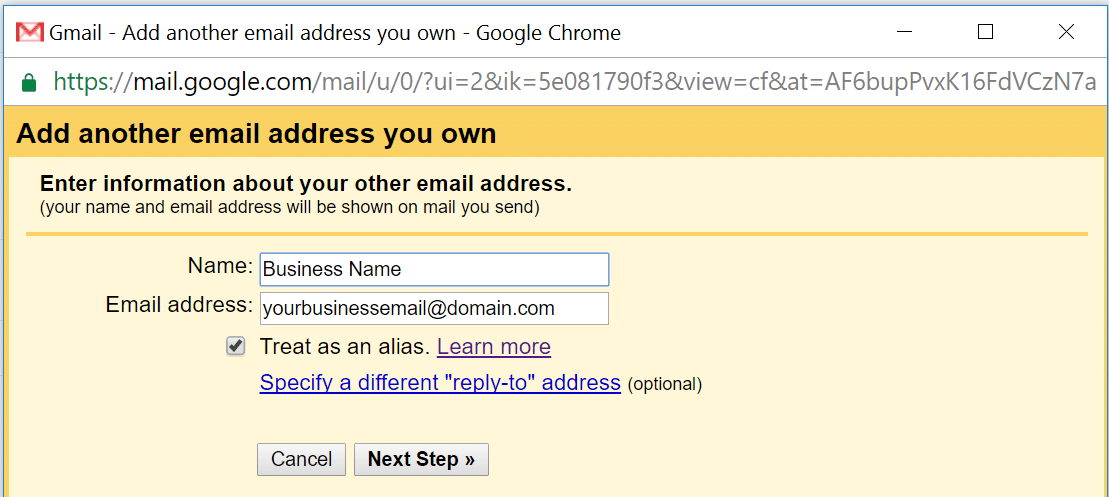
Add other email address
Then for the SMTP server, it will by default show your custom domain. However, you will want to change this to use Google’s free SMTP server. So change it to smtp.gmail.com. Then enter in your personal Gmail address for the username (yourname@gmail.com) and your password. This is the app password you generated earlier, not your Gmail password.
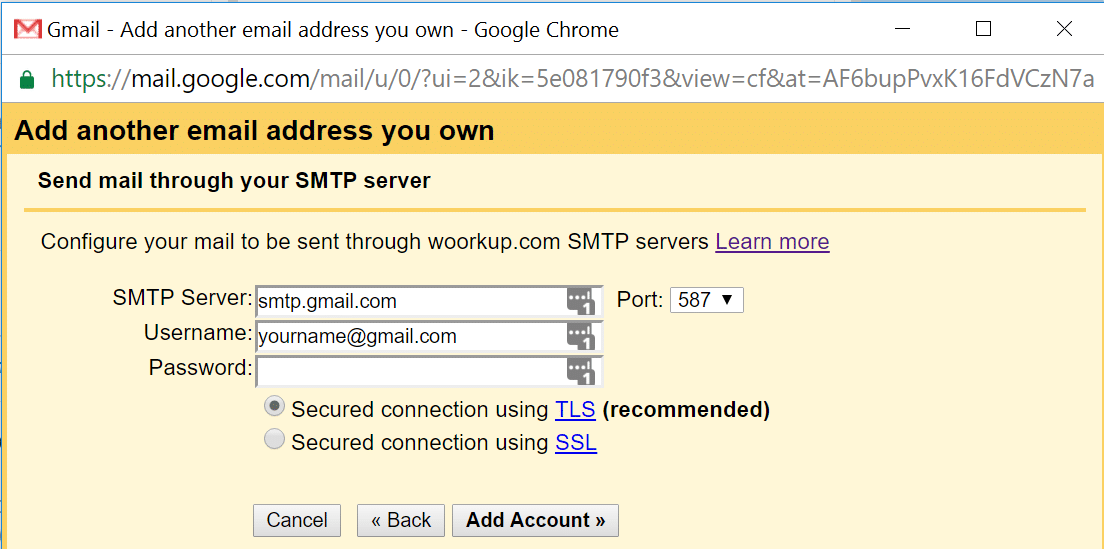
Gmail SMTP server with custom domain
Step 5
It will then send an email confirmation code to the email you just added. You will need to click the link in the email to confirm it or manually enter the code (this proves that you are in fact the owner of the additional email account). And that’s it!
You then can repeat the above steps for your other additional email accounts. Create separate app passwords for each additional email you add.
And now all your email will come to one place and when you go to send mail you can choose from the drop down which one to send from. In the Gmail settings, you can also set the “Reply from the same address the message was sent to” to make it easier when replying to emails.
Tags:
Send Email